
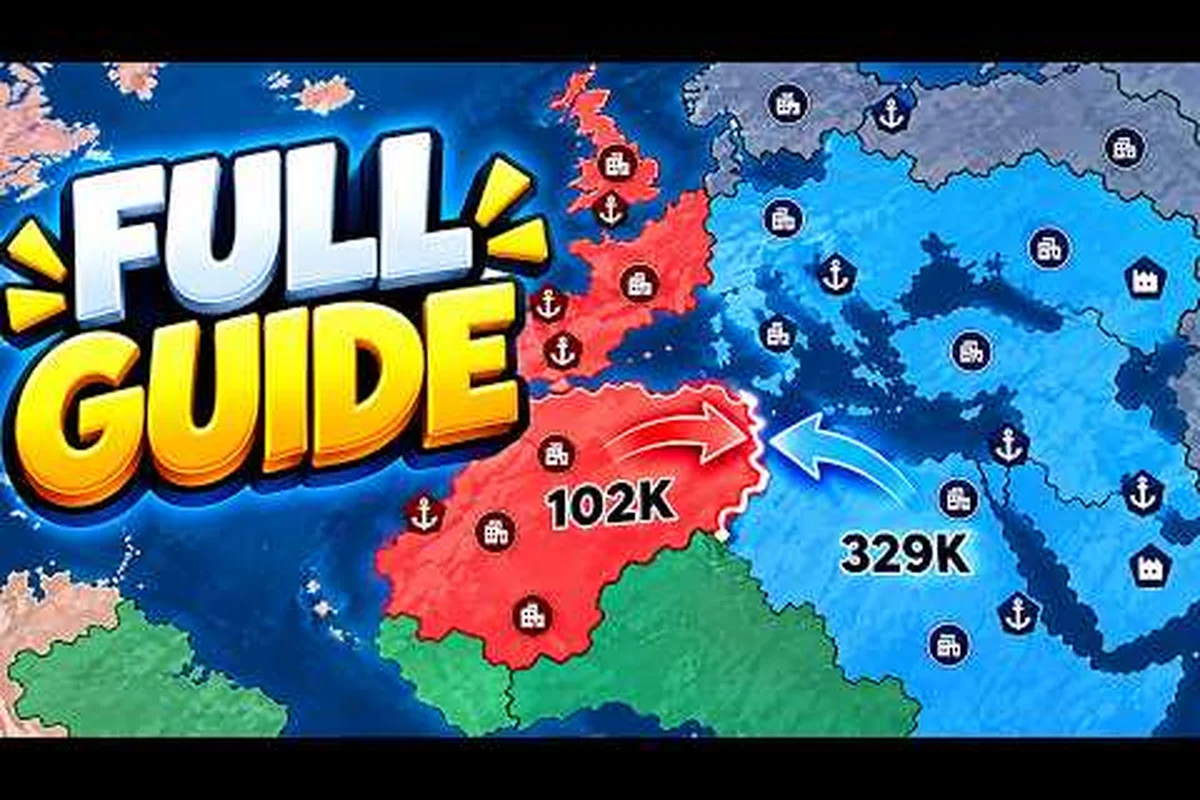
The best attack strategy in RoFront is to isolate a weaker nation, occupy its cities, and preserve a defensive reserve for the counterattack. For example, if two targets have similar troop strength, prioritize the one whose border cities lack garrison support, then reinforce newly claimed territory before expanding elsewhere. This creates constant frontline pressure without committing every troop to a single invasion, forcing the defender to split forces and reducing the impact of a retaliatory strike.
The Best RoFront Attack Strategy Starts With Reconnaissance
A successful offensive begins before troops move. You need to know where a rival’s cities, ports, factories, and exposed borders sit, because a nation that looks powerful on the map can still be vulnerable when its army is split.
The official RoFront game page describes a shared world containing 88 player nations and hundreds of tribes, with victory tied to controlling 80% of the world. That scale makes target selection crucial: a frontal assault against a well-prepared defender may cost more than a patient campaign against an isolated neighbor.
Community reports consistently favor the same opening pattern: preserve the early army, send roughly 1,000 troops to claim unclaimed land, and avoid a direct fight with an active player before the economy is stable. This rofront best attack strategy treats those claims as map control rather than wasted combat.
| Observation | Strategic meaning | Best response |
|---|---|---|
| Enemy holds many disconnected cities | Their troops may be stretched across the map | Pressure one isolated settlement |
| Enemy army is moving elsewhere | The home region is temporarily exposed | Attack the nearest border city |
| Enemy has factories near cities and ports | They can reinforce and produce more troops | Avoid a long attrition battle |
| Empty land sits between your borders | The enemy may not notice the route | Claim it to create another approach |
| Enemy stacks everything in one area | Their flank is likely thin | Use two directions if resources permit |
Reconnaissance priority should be based on distance, enemy activity, and reinforcement speed, not visual proximity alone. For example, the closest border city may sit beside several factories, while a city two routes farther away could have a thin defense and a long reinforcement window. If the enemy army is moving elsewhere, pressure the exposed home region immediately; if their stacks are concentrated, use two approaches to strain troop allocation. A slightly farther city with no nearby factory may offer a safer first conquest.
Read the Enemy’s Likely Reinforcement Path
Watch the roads between the target and its allies. A defender can lose a city if it cannot bring troops to the border, but a defender can also win by forcing your units into a long march. Before committing, compare the distance to the target with the likely route your opponent must travel.
This method works especially well when the enemy owns several cities but has not reinforced all of them equally. The first successful claim creates information: it reveals whether their army is concentrated, whether they react immediately, and whether a second push is safe.
Separate Land Claims From PvP Attacks
Not every offensive order should trigger a battle. Sending about 1,000 troops to empty land can block an enemy’s expansion, secure a useful route, and reveal where the rival expects trouble. It also provides a practical reason to train without committing the full army to a risky target.
A player will often reinforce the closest threatened area. If that response is predictable, your later attack can come from a different front. This distinction makes the rofront best attack strategy more flexible: early sends are probes and land grabs, while larger stacks are reserved for confirmed opportunities.
How to Attack Players Without Overextending Your Army
The central rule of attacking is to preserve the ability to retreat. A stack that wins every initial clash but has no reinforcements can still lose when the defender returns with fresh units. Instead of sending every available troop in one direction, divide your force according to confidence and battlefield conditions.
A reliable formation has three parts: a small claim group, a serious attack stack, and a reserve. The claim group handles empty or lightly occupied land. The attack stack carries enough force to threaten a city. The reserve protects factories, home territory, and escape options.
| Force | Suggested role | Best moment to deploy | Main risk |
|---|---|---|---|
| 1,000-troop claim group | Secure unoccupied land | Early game or while the enemy is distracted | Losing troops to an unexpected defender |
| Main attack stack | Defeat an active player’s troops | After observing a gap in their coverage | Overextending across the map |
| Local reserve | Defend factories and nearby cities | When the enemy counterattacks | Leaving home territory exposed |
| Second-wave force | Capture after the first win | Once the defender is weakened | Arriving before the first stack is secure |
This structure also reduces the temptation to chase every defeated unit. When a defender retreats beyond the city’s immediate coverage, a disciplined attacker should turn toward the objective instead of following into unfavorable terrain. For example, after the main attack stack clears a border city, keep the claim group moving to secure nearby land while the reserve protects factories; only pursue a fleeing stack if the route has open retreat space and the second-wave force is ready. Chasing can expose your attack stack to a counterattack, whereas capturing territory and factories denies the defender reinforcements and preserves your own retreat options.
Use Factory Position to Control the Battle
Community strategy reports recommend placing factories near cities and ports, which can support both defense and offense. A factory near your active front reduces the distance between new production and the soldiers who need it. More importantly, it gives you multiple launches when the enemy believes the front is stable.
A factory-funded attack works best when it has a clear destination. Sending new troops into an already crowded region often creates delays and friendly congestion. If possible, launch them toward a separate objective or wait until the first stack has created a local opening.
The same economic logic applies to conquest planning. Before attacking a major nation, check the RoFront income and building strategy and compare your current resource income with the cost of maintaining the invasion army. If factories are producing units faster than your logistics network can support, a larger offensive can consume more resources than the target returns. For example, when a front is stable and factories can launch into a separate objective, assign extra production to that opening instead of reinforcing a crowded border; preserving income gives you the reserves needed to recover if the first attack stalls.
Learn the Four Stages of an Effective Assault
A strong attack has a preparation phase, a pressure phase, a battle phase, and a capture phase. Combining those stages into one sudden rush may work against weak players, but experienced defenders are more likely to respond to a predictable opening.
| Stage | Main action | Information gained | Decision point |
|---|---|---|---|
| Preparation | Gather troops and identify a weak city | Enemy patrol density and approach routes | Attack or switch targets |
| Pressure | Send a claim group or small probe | Whether the target reacts immediately | Escalate or pull back |
| Battle | Commit the main stack to the weakest route | Enemy strength and reinforcement delay | Exploit the gap |
| Capture | Secure the city and nearby land | New borders and income options | Defend, expand, or pivot |
This staged approach follows the logic in the troop-sending strategy guide, where troop count, destination, and reinforcement timing matter more than a single button press. For example, use a small claim group during the Pressure stage to test patrol density, then commit the main stack only after the defender’s response reveals a weak approach route. If reinforcement arrives quickly during the Battle stage, pull back and switch targets; if the gap persists, press toward Capture and convert the city into a defensible border and income source.
RoFront Invasion Routes, Target Selection, and Timing
An invasion begins with a route that the opponent does not fully control. A direct march through the nearest border may expose your stack to a prepared defense, while an indirect path can force the defender to split attention. Geography matters because every extra road segment is time the enemy can use to respond.
Choose among three primary routes based on what you observe. A direct route is fastest and easiest to reinforce, so it works when the target is weak or already engaged elsewhere. A flanking route takes longer but can arrive behind the enemy’s strongest line. A capture route uses smaller forces to take empty land, creating a new border and forcing an unfavorable response.
| Route | Advantages | Limitations | Best target |
|---|---|---|---|
| Direct border | Fast reinforcement and short supply line | Defender can focus the full army | Distracted or weak nation |
| Flank through neutral land | Forces the enemy to guard two sides | Slower march and longer return trip | Nation with a one-sided defense |
| Land seizure | Low cost and expands your frontier | May not produce an immediate kill | Exposed outer territory |
| Second front | Splits enemy attention | Divides your own available troops | Attacker with a secure reserve |
Use Player Pressure to Open a Real Invasion
Sending two forces is only useful if they create separate obligations. If both stacks travel to the same area, the enemy can defeat them in sequence. If one captures land on the opposite side, the defender must choose between losing territory and abandoning the main front.
A practical sequence is to claim an unoccupied region, wait for the enemy to react, and then attack the area that loses protection. The timing should come from observed behavior, not a fixed clock. Community players report that the first reaction can reveal priorities, especially when one border remains quiet while another attracts immediate attention.
The goal is to create competing threats that make every defense costly. For example, if your main force pressures the enemy’s northern border while a second stack captures a nearby region, their troops must divide between reinforcing the contested border and protecting the exposed territory. Watch which route the enemy reinforces first, then concentrate your strongest attack against the neglected side; that is the central idea behind a practical rofront invasion guide: make the opponent defend several problems, then attack the one they cannot protect without surrendering something valuable.
Rank Targets by Value and Resistance
Not every captured nation contributes equally. A target near your territory may be safer, but a distant target could provide resources or block a dangerous rival. Score potential targets using four measures: current troop strength, factory proximity, strategic location, and value after capture.
| Target profile | Conquest value | Risk | Recommended pressure |
|---|---|---|---|
| Isolated outer city | Low-to-medium | Low | Claim with a small group |
| Enemy border city | High | Medium | Probe, then attack with main stack |
| Factory-linked city | Very high | High | Distract elsewhere first |
| Distant capital | Strategic | Very high | Prepare a multi-front campaign |
| Rival next to another rival | High | High | Force conflicting defensive duties |
When evaluating a target, remember that the official goal is world control, not merely a kill score. The right conquest can block an opponent from expanding, protect a valuable region, or make a later campaign possible. A broader view of the map improves the rofront conquer guide approach because every city can be a platform for the next advance.
Time Attacks Against Overextended Enemies
The best moment to invade is often when the enemy is moving troops rather than while they are waiting at home. Watch for an offensive that pulls defenders away from a border, a construction project that occupies attention, or a sequence of claims that leaves a route uncovered.
Use the 1,000-troop claim pattern as a timing device. A small send can force a reaction and expose where the enemy’s reinforcement center is. If the opponent moves quickly toward that claim, your main stack can attack a less protected city. If the enemy ignores the claim, you may already have gained territory without a major battle.
Turning a Successful Attack into Nation Conquest
Winning a battle is only halfway to conquering a nation. After the enemy retreats, capture the relevant city, secure the surrounding land, and protect the route home. An attacking player who captures a city but leaves it exposed can lose the reward during the counterattack.
The conquest phase should be treated as a separate operation. Expansion consumes factories and troop capacity, while a vulnerable border can force you to split attention. Before moving deeper into enemy territory, decide whether your income, army, and factories can support the extra front.
This is where the wider RoFront world-domination strategy becomes relevant: territorial control must support the next stage rather than simply inflate a map. A conquered city without income and nearby land may be a temporary score with little strategic value.
Capture a Network Instead of Isolated Cities
A single city surrounded by hostile territory is difficult to supply. Capturing adjacent settlements creates a corridor, protects the first prize, and gives your troops more objectives from which to operate. This network effect matters because each secured settlement can reduce the distance between factories and active fronts.
After a victory, consider three priorities: consolidate the captured settlement, extend your territorial network, and preserve the resources needed for the next offensive. Securing a city is more useful when nearby settlements are connected, because the network improves supply lines and reduces exposure along the invasion corridor. For example, capturing two adjacent cities can create a defensible route between your factories and the front, allowing captured production capacity to support later operations instead of remaining isolated.
-
Secure the win: Hold the city and prevent an immediate counter-capture.
-
Connect the map: Claim nearby land to create a route between your existing territory and the new objective.
-
Preserve capacity: Keep enough troops to defend factories and the home border while exploiting the opening.
Treat conquest as a multi-stage campaign rather than a one-off capture. After linking settlements, use the conquered nation’s cities as forward staging points, its factories to replenish troop production, and its territory to split enemy attention. For example, occupying a city beside an enemy border can shorten troop travel to that front, while captured factories may fund a second offensive without drawing as much attention from rivals. This creates leverage: defending one front frees resources for another, and rivals must either reinforce the threatened border or risk losing another connected city.
Avoid the “One Big Stack” Trap
Concentrating every troop in one invasion may look powerful, but it creates a predictable target. The defender knows exactly where the danger is coming from and can commit every available unit to that route. A second front, even a smaller one, can force the opponent to make a harder decision.
The practical rofront how to conquer nations method is to build local superiority, not merely numerical superiority in one place. Use claims to establish geography, factories to sustain pressure, and the main army against the confirmed gap. This sequence is more resilient than a single all-in march.
Set a Stop Point Before the Battle
Define the moment you will disengage. Examples include receiving a strong counterattack, losing access to a factory, or having the target reinforced faster than expected. A stop point prevents a victory from turning into a costly pursuit and keeps your remaining force available for the next opportunity.
Without that limit, successful troops often continue into enemy territory until supply lines stretch beyond what the army can support. Retreat can look like failure, but preserving troops after a favorable trade is one of the strongest strategic habits in territorial warfare.
Defense Guide Principles That Make Attacks Costly
Even the best attack plan should assume that the target may notice, prepare, and counterattack. A resilient nation does not need to win every defensive battle; it only needs to make each invasion expensive enough that the attacker changes targets.
A strong defense combines early warning, layered positions, and enough reserve power to answer a breakthrough. The objective is not to hide every troop until the last second, because that can make an invasion too cheap. Instead, make the defender appear stable while ensuring that a committed attacker can still be punished.
| Defensive asset | Best use | Warning sign |
|---|---|---|
| Border city | Absorb the first strike and delay attackers | Placed too far from other defenses |
| Factory cluster | Reinforce threatened regions quickly | Located behind weak territory |
| Home reserve | Counterattack after the enemy commits | Spent on the first border contact |
| Second border | Force attacks to split | Left empty because resources are concentrated |
| Shared road network | Speed up reinforcement | Enemy can cut the main route |
Defend in Layers
The first layer should be a border city or fortified position, not your entire national army. The second layer should contain factories and support troops that can reach the front quickly. The final layer is a mobile reserve capable of striking once the attacker commits.
This layered approach makes the rofront defense guide more practical. A single mass of troops may be numerically impressive, but it can be bypassed, surrounded, or defeated in one engagement. Layered defense creates time, which lets the defender turn scattered fronts into a coordinated response.
Force the Attacker to Spend More Time
A city positioned near valuable territory can force an invader to travel farther before reaching the objective. Another city can cover the route between two likely attack points. The best defense is therefore not always the highest wall; it is the position that creates the most problems for several possible invasions.
Map control also protects the economy by denying the attacker access to factories and troop-production buildings. If an invading force must cross long stretches of defended territory, it spends more deployment time before engaging, while the defender can continually reinforce key positions with fresh troops. For example, an attack split across several cities may be unable to destroy a concentrated garrison quickly enough, allowing the defender’s production rate to outpace the invader’s losses and turn an otherwise risky invasion into a losing exchange.
Use Alliance Pressure Carefully
Alliances can distract an opponent, but they can also make a successful counterattack more dangerous. Coordinate with a trusted ally only when both sides understand the timing and target. An ally who commits too early may lose troops, while one who waits too long may allow the attacker to escape with a capture.
The RoFront alliance and war strategy explains how to coordinate defensive pressure and declarations of war. Even so, a shared operation should preserve each member’s ability to protect its own territory rather than treating the alliance as permission to overextend.
A Practical Attack Plan for Each Game Phase
The strongest rofront best attack strategy changes as factories, territory, and enemy pressure change. In the early game, your objective is stability and safe expansion. In the middle game, you can use claims and local stacks to create multiple fronts. In the late game, each battle may affect the 80% world-control objective, making factory positioning and coordinated timing more important.
| Phase | Primary goal | Recommended action | Force to commit |
|---|---|---|---|
| Opening | Build a stable economy | Claim empty land and avoid costly early PvP | About 1,000 troops for a claim |
| Expansion | Secure useful territory | Connect cities and factories | Small local stacks |
| Mid game | Create a defensive advantage | Probe targets and exploit reactions | Main stack plus reserve |
| Late game | Contest major territory | Coordinate fronts and protect factories | Concentrated force, but never all of it |
Early Game: Economy Before Pressure
The early phase is not the time to hunt every nearby player. Your army may be strong enough to win a small clash, but losing troops can delay factory construction and leave your home territory exposed. Claim open land, develop income, and learn where enemies build factories.
A good early decision rule is simple: if the target has nearby enemy cities and an active army, wait. If it is isolated and lightly held, a small claim may be worthwhile. This prevents a temporary score from becoming a long-term resource loss.
Mid Game: Pressure and Counterpressure
Once production is stable, attack beyond your border. Start with the direction where the enemy appears least secure, then watch which area they reinforce. The other side of the map may become your real opening, especially if the enemy has chosen between protecting valuable land and punishing your first claim.
Keep the main stack mobile during this phase. Move it toward the confirmed weakness only after the defense shifts. This is often more effective than continuing to pressure the same target, because the defender has already paid part of the cost of your first move.
Late Game: Control and Contingency
As the world-control threshold approaches, invasions can trigger large defensive responses. Your factories need protected supply routes, and your reserves need a clear job. Keep one force for emergencies while committing the rest to a precise objective, because the cost of a mistake rises sharply when enemy players are contesting the same final percentages.
A mature conquest plan should include a fallback target. If the primary city is reinforced, pivot to an outer settlement rather than feeding troops into a defended position. If your factory is threatened, defend it unless the enemy’s exposed border offers a better trade. The best strategy is the one that preserves options.
A Quick Decision Checklist
Before launching an invasion, verify four linked conditions: the target is isolated, the factory can continuously support the route, the reserve can absorb losses, and the objective remains reachable if the first assault fails. For example, if enemy troops are distracted on another front but the route crosses hostile territory, the opening may look favorable while production cannot reach the battlefield; secure the supply path and a secondary capture target first, then commit the main strike.
| Check | Green light | Red flag |
|---|---|---|
| Target strength | Enemy is split or distracted | Full army waits at the border |
| Route | Supply line is short and protected | Long march crosses hostile land |
| Production | Factory can support the front | New troops cannot reach the fight |
| Reserve | Home defense remains intact | Every unit is committed |
| Objective | Capture is clear | Attack has no strategic endpoint |
The final discipline is restraint. Not every weak-looking target is worth conquering, and not every successful attack deserves a second push. Preserve your army, keep factories productive, and attack when the enemy’s attention gives you a concrete advantage. Used together, these steps make the rofront how to attack players approach consistent rather than dependent on luck, while the broader rofront how to invade methods keep every offensive tied to long-term territorial control.
Frequently Asked Questions
How many troops should I send when attacking a player in RoFront?
Community reports suggest using roughly 1,000 troops for an early claim and avoiding direct fights with prepared players. As your army grows, scale the main stack against the target while retaining a reserve for defense. Exact strength depends on enemy activity, route length, factory support, and the value of the city you intend to capture.
Should I attack an enemy with many cities or one with few?
Fewer cities can signal a divided defense, but they may also have stronger troops and better factories. Check the target’s reinforcement speed before committing. An isolated nation is attractive when its army is elsewhere; a large nation is easier to pressure when several borders can be attacked without overextending your own forces.
What is the best way to invade without losing too many troops?
Use small land claims to reveal reactions, then commit your main stack only after identifying a weak direction. Avoid long marches through hostile territory, keep factories close enough to support the front, and preserve a reserve. This staged approach makes it harder for the defender to concentrate every available unit against your arrival.
How do I conquer a nation after winning its first battle?
Capture the city, secure nearby land, and connect it to your existing territory before advancing deeper. Protect factories and preserve enough troops to stop a counterattack. Conquest becomes sustainable when each captured settlement supports the next operation instead of remaining an isolated prize.
How should I defend against a coordinated invasion?
Use layered positions: a border city, a nearby factory cluster, and a mobile reserve. Delay the attacker at the border, reinforce the threatened route, and counterattack after their force commits. Coordinate with an ally only when both sides can protect themselves while the shared operation proceeds.