
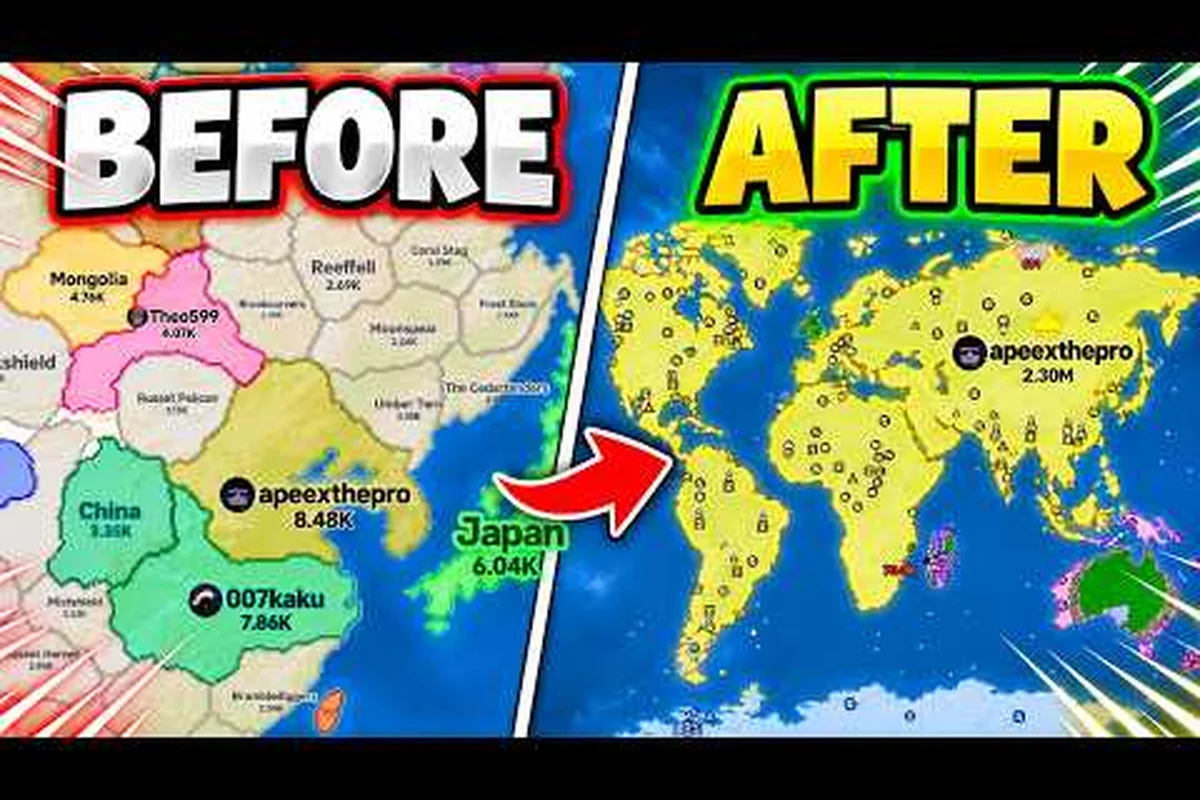
RoFront control the world requires more than repeated attacks: you need territory that pays for troops, borders that absorb pressure, and expansion routes that connect your strongest regions. The official game page identifies the goal clearly—conquer 80% of the world—but this map conquest guide shows how to reach it without overextending your army.
RoFront Global Conquest Plan and Map Scale
The official RoFront on Roblox page describes a shared world with 88 player nations, hundreds of tribes, and a victory condition requiring 80% territorial control. That scale changes how you should plan: isolated enemy land may be easier to defeat, but disconnected captures can produce a large number on the scoreboard without giving you a coherent, defensible empire.
A successful rofront global conquest guide therefore follows three linked systems: secure a compact opening economy, absorb nearby territory in logical groups, and keep enough production and troop reserves to defend the land already won. The map is not a checklist of distant targets. It is a network of borders, resources, routes, and pressure points, so a short-term capture that weakens your economy is often worse than a carefully chosen one.
| Scale factor | Official information | Strategic implication |
|---|---|---|
| Player nations | 88 | Opponents can appear across several fronts |
| Tribes | Hundreds | Small targets may be common, but not necessarily valuable |
| Victory threshold | 80% of the world | Fragmented land can still become unusable |
| Server capacity | Up to 55 players | Diplomacy and timing matter as much as raw troop count |
| World structure | Shared real-time map | Expansion decisions are competitive, not isolated |
What Makes the Map Worth Conquering?
Territory has value only when it supports a larger objective. A useful region should contribute population or production, connect existing holdings, block a dangerous approach, or sit near a profitable expansion path. Contested value is better than empty land because a contested district gives every capture a purpose and can become the hinge between two larger operations.
A compact territory, by contrast, may look weak on the map yet produce the strongest foundation. Cities, ports, and factories can fund the next wave, while nearby borders offer several routes for opponents to threaten you. If you want help interpreting these positions before committing, the RoFront map guide explains how to identify routes, regions, and important terrain features.
Separate Map Size From Map Density
Players searching for rofront how big is the map often expect a simple number, but the official description emphasizes a world shared by dozens of nations and hundreds of tribes. A better answer is that the map is large enough to create multiple fronts and scarce enough for territory to remain contested. The useful distinction is density: crowded regions require more caution, while distant regions may cost more travel and coordination than they return.
| Region type | Main benefit | Main risk | Best approach |
|---|---|---|---|
| Dense border region | Nearby opponents and strong competition | Repeated border attacks | Build reserves before crossing |
| Resource-rich interior | Economic and production value | Difficult reinforcement | Secure access routes first |
| Peripheral land | Space for future expansion | Long travel and weak defense | Take only after the core is stable |
| Enemy corridor | Connects valuable regions | Concentrated resistance | Divide attention across two fronts |
| Tribal area | Smaller or fragmented targets | Unpredictable resistance | Use only when the route is clear |
RoFront Geography Guide: Read Regions as Strategic Chains
A rofront geography guide should focus on movement and value rather than decorative landmarks. Start by separating the world into three layers: the economic core, the contested middle, and the outer expansion belt. Your core contains the cities, ports, and factories that support your army. The middle holds the most useful land, while the outer belt offers room to grow if the campaign remains stable.
This regional model also helps you read the map quickly. A cluster of enemy borders on one side may look threatening, but it can protect a valuable corridor on the other. Conversely, a peaceful-looking region may be strategically poor if it has no production and sits behind enemy territory. Geography becomes useful when it clarifies where your next move should be and what it may cost.
Build a Regional Ownership Chain
A good conquest chain should connect your existing territory to the next target without leaving a dangerous gap. Suppose your nation controls two cities, one port, and a factory. Instead of claiming three unrelated provinces, take the district that links those assets, then capture the nearest enemy region. Each step should make the next step easier.
Ownership continuity is the principle to protect. A contiguous empire is easier to defend because reinforcements and construction bonuses can support one another. It also gives you clearer information about enemy movement. If your lands form separate pockets, opponents can pressure each pocket independently and force you to split a force that should remain concentrated.
Identify Choke Points and Dead Zones
Choke points are the passages that make neighboring regions strategically connected. Control them when they support your direction of travel, but do not spend troops merely to decorate a map with extra border. A useful choke point has at least one of three traits: it protects economic assets, blocks access to a target, or reduces the number of fronts you must defend.
Dead zones work in the opposite way. They may be easy to enter, yet they offer no meaningful route onward. Taking them often produces a crowded scoreboard without reducing the resistance around your core. Before advancing, ask where the army can go after the capture and which production can support the next move. If the answer is nowhere and nothing, the land is probably a detour.
| Question | Strong yes | Weak no |
|---|---|---|
| Can the capture connect two holdings? | It closes a strategic gap | It creates another isolated pocket |
| Does it support production? | It helps fund the campaign | It only adds empty land |
| Can you reinforce it? | Several routes exist | One route is already under pressure |
| Does it reduce threats? | It blocks a major approach | It barely changes enemy access |
| Is there a next objective? | It opens a conquest route | It ends at a geographic dead end |
RoFront Map Regions and the 80% Conquest Objective
The 80% objective makes percentages more important than isolated captures, but raw percentage still does not reveal whether your empire can survive. You may hold 60% of the map and lose because distant holdings cannot be supplied, or hold fewer regions and possess a compact base that supports continuous expansion. Track both total control and operational control as you move through the match.
This rofront map regions approach also changes the target order. Capturing a key neighboring region early may have a greater effect on the final map than taking a distant region later. A secure center allows you to approach exposed borders gradually, whereas an early remote grab can create a front that consumes production and attention throughout the match.
Divide Your Map Score Into Three Layers
Use the following tracking method after every major capture. First, record the land you can use for production or reinforcement. Second, record the land that merely adds percentage but requires a separate defense. Third, identify land that blocks enemy access to the rest of your empire. This classification makes front integrity visible and exposes whether your territory is becoming fragmented.
| Control layer | Percentage contribution | Operational question |
|---|---|---|
| Core | Primary | Can this land consistently fund and defend the campaign? |
| Connected | Secondary | Does it reinforce the core or bridge two parts of it? |
| Isolated | Tertiary | What is the cost of retaining this disconnected territory? |
Do not wait for the final minutes to calculate this. If a distant capture adds 3% but requires 15% of your available force, it may be a poor trade. Conversely, a corridor adding 1% may be excellent if it opens two high-value regions and eliminates a dangerous route. The objective is not random land collection; it is territorial efficiency.
Use the Map to Create Sequential Pressure
Sequential pressure means forcing an opponent to react to one front while you prepare another. You do not need to attack everywhere at once. Capture a region, observe which neighboring borders change, then choose the next target based on the response. If the enemy reinforces one side, another may become temporarily weaker. If they ignore a border, that may indicate low value or a planned counterattack.
A short operational cycle works well because it turns the map’s neighboring regions into a decision chain: pressure one border, watch the enemy’s troop movement, and use that response to identify where supply routes or production access are vulnerable. For example, if a defender shifts troops away from a region with fewer resources, that border may become easier to secure, but overextending there can expose a rear flank. Alternating between a threatened frontier and a quieter neighboring region keeps your rofront control the world plan focused on achievable map regions rather than simultaneous, scattered claims.
-
Select one region that extends your core and has a clear supply route.
-
Prepare enough troops to survive initial resistance and retain a reserve for border response.
-
Capture only the intended region; do not improvise an extra claim in the same direction.
-
Assess the new border, production access, and enemy reinforcement pattern.
-
Convert that information into the next target before spending again.
This cycle limits waste and keeps the army moving as a single force, while making your rofront control the world plan measurable through three map-specific checks: the claimed region, the newly exposed border, and the defender’s next reinforcement path. For example, if securing a production-adjacent region diverts enemy troops from a second frontier, compare that border’s troop balance and supply access before committing your reserve; every action should clarify what changed, which vulnerability opened, and what becomes possible next.
RoFront Region Guide for Expanding Without Overextending
A strong rofront region guide starts with the understanding that territorial expansion has a carrying cost. Cities, ports, and factories create value, but every border also creates a place where an enemy can test your defense. The best campaign balances newly gained space with manageable responsibility, especially while factories are still paying for new infrastructure and troop production remains exposed.
Begin with a strong starting area and capture only the nearest useful land. A concise starting-location strategy can help you compare access to neighbors, open routes, and the risk of an early multi-front fight. Once your first region is stable, expand along one axis before attempting to wrap around the map.
Choose the Correct Regional Expansion Order
There are four useful opening orders, each tied to a different position. A compact builder prioritizes a factory and nearby land. A coastal player can use ports to support a steadier campaign. An aggressive player takes adjacent territory early, but only with enough reserves to handle a counterattack. A diplomatic player delays major conflict until an ally covers the exposed side.
| Strategy | First regional goal | Second goal | Main mistake |
|---|---|---|---|
| Compact economy | Protect the factory area | Take adjacent production land | Expanding before production stabilizes |
| Coastal control | Secure a port corridor | Connect nearby coastal regions | Treating a port as safe without a land route |
| Aggressive expansion | Capture the nearest rival border | Absorb a second adjacent region | Sending every troop on the first attack |
| Balanced control | Take one compact region | Develop the next economic cluster | Chasing percentage far from supply |
The best order is the one your current position can support. A large opening land grab is not impressive if it forces you to defend multiple weak fronts. Conversely, excessive caution can let stronger neighbors establish positions that block your later expansion. The practical target is one secured region plus one prepared route, not a maximum claim count.
Match Each Region to a Specific Purpose
Every captured region should have a job. Label it as production, bridge, buffer, target, or reserve. Production regions fund the army. Bridge regions connect your holdings. Buffer regions absorb attacks. Target regions contain valuable assets. Reserve regions may look less urgent, but they can give you room to maneuver later.
This labeling prevents wandering campaigns. If a region does not fit a category, it may be expendable, although that decision should be deliberate. In the final third of a match, you may need percentage more than a perfect shape. Before then, prioritize regions that improve supply and reduce active threats, because those benefits compound.
Coordinate With Allies Without Depending on Them
Allies can hold a border while you focus on a distant operation, but cooperation should never obscure responsibility. Agree on who attacks, who defends, and which territory changes hands. Use the RoFront strategy guide for broader timing principles, while keeping map-specific goals clear: one region, one owner, one visible purpose.
Treat an ally’s territory as a separate defense problem even when the border is friendly. A joint operation can pressure an enemy who is balancing several threats, but excessive coordination delays the campaign. Community reports on the r/Roonby beginner discussion emphasize building an economy before risky expansion and using troop reserves to pressure opponents, though community advice may lag behind the latest balance changes.
RoFront Global Conquest Guide: From Opening Territory to 80%
The final stage of a rofront global conquest guide is not a single giant attack. It is a sequence of fronts created by your earlier position. A strong empire has a protected center, productive neighboring regions, and an enemy whose remaining territory can be approached through manageable paths. Sequential isolation then removes one outer region at a time.
Track progress using three indicators: your total controlled percentage, the percentage that is securely connected, and the enemy’s ability to threaten your production. If total control rises while secure control falls, you are accumulating fragile claims. If secure control rises but the percentage stalls, you may need one coordinated offensive to convert your advantages into the final objective.
Endgame Sequence That Preserves Production
First, repair the supply network. Identify the factory or port that supports your largest army and make sure enemy borders cannot cut it off. Second, clear the closest exposed region. This prevents the opponent from using one counterattack to reopen several fronts. Third, select a corridor that separates enemy territory. Holding a corridor can make remaining lands easier to contain even before they are captured.
| Endgame stage | Primary action | Why it matters | Avoid |
|---|---|---|---|
| Stabilize | Secure production and reserve routes | Preserves the ability to act | Attacking from an unstable core |
| Consolidate | Remove nearby exposed regions | Reduces active enemy fronts | Chasing distant percentage |
| Isolate | Control corridors between enemy groups | Simplifies later captures | Spending troops on irrelevant land |
| Convert | Capture priority regions in sequence | Reaches the 80% threshold | One reckless all-in attack |
| Lock | Reinforce the final borders | Prevents a late reversal | Assuming victory removes all danger |
The 80% threshold also creates a timing question. If you have 79% and a broad enemy counterattack begins, capturing one more remote region may be less valuable than stabilizing your position. You do not have to chase the highest immediate gain; you have to finish the match with the threshold secured. This is especially important when the official page lists a server capacity of 55 players, because several regional pressures can appear at once.
Maintain Reserves Instead of Consuming Them
A reserve is not wasted strength. It protects factories, answers border attacks, and lets you take advantage of an enemy mistake. Community experience consistently frames troop management as central to winning, but the exact income and training numbers are not publicly documented, so avoid treating unofficial calculations as permanent facts.
Before each offensive, reserve enough strength to handle one credible counterattack. If you cannot identify your reserve, you are likely confusing committed troops with available troops. A practical rule is to distinguish three groups: committed force for the current capture, mobile reserve for nearby threats, and strategic reserve for major counters. Never count the strategic reserve twice when calculating the next attack.
Practical RoFront Control Checklist
A repeatable checklist is more useful than an idealized opening build because the RoFront map changes as other nations expand, retreat, or capture key regions. Review your territory percentage, bordering nations, regional chokepoints, and exposed supply routes after every major capture; for example, taking a distant province may raise your global control percentage while weakening a vital connection to your starting region. Recheck this review whenever your territory approaches the 80% win condition, since defending the last frontier gaps can matter more than claiming one more province.
Before an Expansion Move
-
Map value: The target connects to existing holdings or blocks a useful enemy approach.
-
Supply: A factory or port can support the operation without exposing the entire army.
-
Route: Reinforcements have more than one approach, or the chosen route can be defended.
-
Resistance: You have enough troops for the region and a reserve for a border response.
-
Purpose: The target has a label: production, bridge, buffer, target, or reserve.
After a Capture
-
Connectivity: The new region strengthens the core rather than creating an isolated pocket.
-
Control score: You know how much of the map you hold and how much is operationally secure.
-
Enemy response: You have observed reinforcements, counterattacks, and neglected borders.
-
Production: New assets are protected before the next offensive.
-
Next route: You selected the following objective, or intentionally chose to consolidate.
A final review should include a map-level reset. Hide the territorial percentages for a moment and identify your economic spine: the connected group of cities, ports, factories, and defended corridors that supports everything else. If that spine is secure, the 80% objective is a sequence of achievable regional operations. If it is not, the next action should be defense and consolidation, even if another capture appears available.
Frequently Asked Questions
How do you control the world in RoFront?
Build a strong economic base, capture connected regions in a deliberate order, and preserve troops for defense. The official goal is to conquer 80% of the world, so raw percentage matters, but secure and defensible territory is more valuable than scattered claims. Build income before committing to large offensives, then select one frontier at a time.
Is the RoFront map very large?
The map contains 88 player nations and hundreds of tribes, making it large enough for multiple regional fronts. Its practical scale depends on server population and the number of active players, while the official server limit is 55 players. Treat the map as a connected strategic system rather than a collection of isolated targets.
Which RoFront regions should you capture first?
Prioritize regions that connect to your starting territory, support production, or reduce the number of threats around your core. Avoid distant land that adds little income and creates a separate defensive burden. A compact beginning normally makes later expansion easier because your army can reinforce nearby fronts more efficiently.
Should you chase 80% control or secure a larger region?
Secure the core first, then chase the threshold in controlled stages. A region that produces income and connects your holdings can be worth more than a distant capture with a larger percentage. As you approach 80%, however, prioritize defensible captures because an enemy counterattack can reduce your total faster than a small gain can restore it.
How do you avoid overextending during a RoFront conquest?
Keep separate committed troops, a mobile defense reserve, and a strategic reserve. Expand only when the next region can be supplied and the current borders can survive without sending every available soldier. If production, routes, or defensive reserves are unstable, consolidate before making another large claim.