
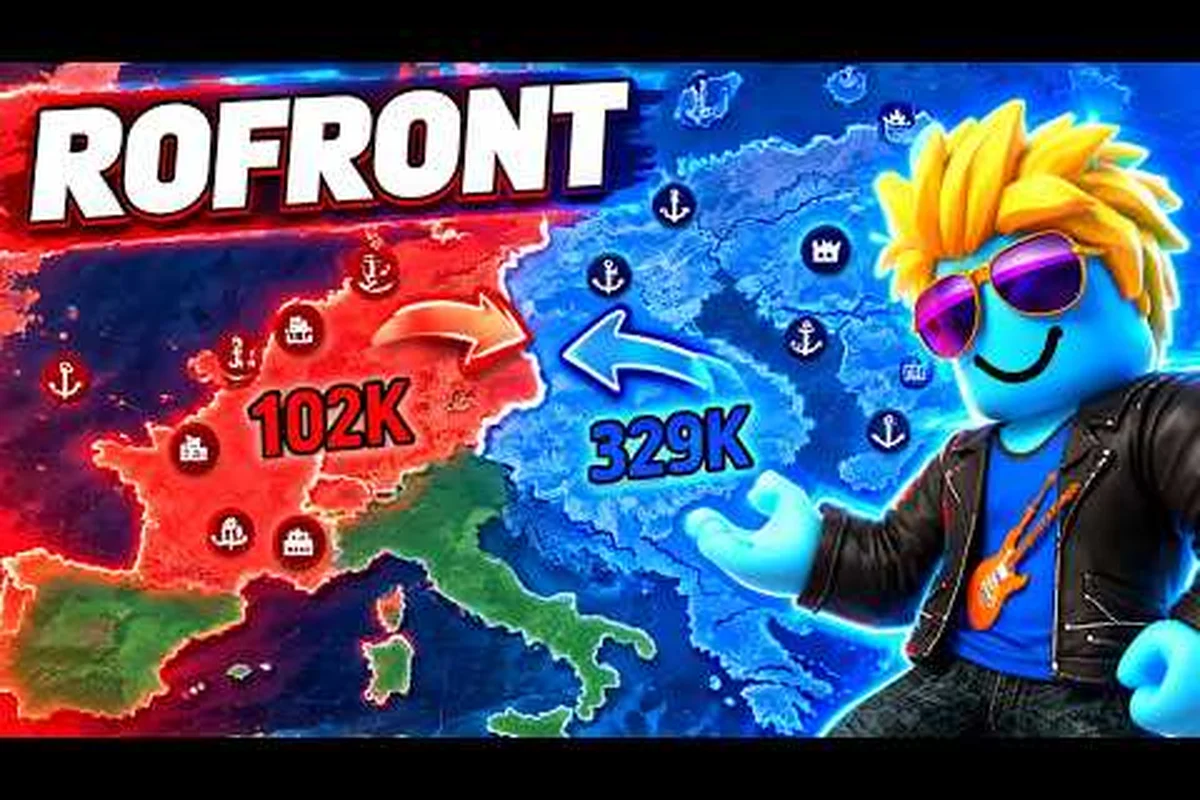
A strong RoFront late-game nuke strategy matters because controlling 80% of the world requires more than raw firepower: your Weapons of Mass Destruction should break enemy territorial continuity, damage rival cities, and create space for your nations and tribes to expand. Time a strike for rivals spread across multiple contested regions, target the cluster that blocks your next conquest push, and keep enough military capacity to defend your exposed cities from retaliation. A well-placed nuclear option can shift the map; a poorly aimed one can leave your own economy and border positions vulnerable.
The official RoFront game page confirms that conquest is fought across a shared map with 88 player nations and hundreds of tribes. It also gives the clearest end-state target: hold 80% of the world to win. That makes nukes a territorial tool rather than a simple damage button, because a poor launch can ruin an economy, trigger retaliation, or expose the cities you spent the entire match building.
How Late-Game Nukes Change the Map
Once conventional expansion slows, a nuclear strike can remove a stubborn blocker, punish an exposed rival, and open a route through defended territory. That makes it the centerpiece of RoFront’s weapons of mass destruction category, but only when the target is chosen for strategic reasons. A nuke that destroys empty land does little; one that removes an active rival’s cities, factories, or ports can shift the entire balance.
The official page identifies cities, ports, and factories as the core development structures. Late in a match, their value is greater because infrastructure that once seemed secondary now supports a much larger war machine. Striking a target with several active cities can interrupt production, isolate allied territory, and create a chain reaction. Infrastructure denial is therefore more important than raw blast size in many late-game situations.
Official information establishes the 80% victory condition, but it does not publish exact nuke costs, build times, range limits, or damage values. The official page snapshot verified on October 25, 2026, also notes that the game launched in September 2026 and had not yet produced a public changelog. Any specific economy or damage number should consequently be treated as a community observation, and a reliable nuke timing guide can help organize what to watch while official values remain unsettled.
| End-game objective | Best nuke use | Immediate goal | Longer-term value |
|---|---|---|---|
| Break a blockade | Hit the enemy concentration behind it | Create a land corridor | Connect distant holdings |
| Punish an exposed rival | Target active cities or production centers | Reduce their war capacity | Slow their reinforcement cycle |
| Finish a trapped opponent | Strike the last fortified region | Force surrender or elimination | Gain territory without a long siege |
| Create a diversion | Threaten one side while moving against another | Split enemy attention | Secure a more profitable target |
| Protect your lead | Use deterrence rather than firing recklessly | Force rivals to defend | Preserve economic and troop stability |
This rofront nuclear option guide is therefore built around a hierarchy: territory first, production second, deterrence third. Damage matters, yet the purpose of the strike should be clear before launch. If a nuke cannot help you reach, hold, or protect a larger share of the map, it is simply expensive noise.
Read the Board Before You Aim
A late-game board is divided by more than visible ownership. Look for cities that anchor a rival’s territory, ports that keep supplies moving, and factories that indicate a sustainable military build. These structures form a network, so hitting an isolated town can be less valuable than disrupting a connected industrial region. A strike in the wrong place may merely create a frontier that another player can occupy.
Community reports generally describe late-game nations as becoming more cautious because every major nuclear launch announces the shooter’s priorities. That means your target can influence the next move by opponents who do not want to be caught with their cities exposed. A credible threat can be worth more than an immediate blast, especially when your own territory is larger and easier to defend.
Track three signals before committing a nuke: the rival’s nuclear stockpile and launch readiness, the defensive coverage around their industrial heartland, and the alliance network that may retaliate after the strike. A useful test is to compare the target’s city cluster with the nearest friendly port and factory corridor: if those structures share a connected region, a nuclear hit may damage supply lines and unit production rather than remove one isolated city. A missed launch also exposes the shooter’s strategic priorities, so a threatened nation may postpone reinforcement, redeploy units inward, and surrender initiative on another border. Weigh that coercion against the risk that a concentrated enemy force, exposed ports, or an active alliance turns the blast into a wider front.
-
Concentration: Are enemy units and structures gathered in one identifiable region?
-
Exposure: Can the target be reached without creating a larger opening elsewhere?
-
Reaction risk: Will the hit trigger several rivals to attack your weakest border at once?
The official description says players can forge alliances, so a rival’s strength may not always be yours. A nation bordering one major enemy may be a temporary partner, while a distant player is a safer target. The best target is therefore the one whose removal helps your alliance network rather than handing useful land to someone waiting off-screen.
Target Selection for Nuclear Dominance
Target selection is the most important part of this rofront late game nuke strategy. The best target is not always the strongest enemy; it is the opponent whose removal produces the largest strategic gain for the smallest retaliation risk. Strongest players may have deeper defenses and more allies, while a weaker player positioned beside your territory may be the more valuable elimination.
Begin with the contribution map. Divide the visible world into regions and estimate which areas are essential to your path toward 80% control. You do not need exact territory percentages for every rival; broad zones are enough. Then compare those zones with your own territory, allied nations, and major enemy strongholds. A border region held by a medium-power nation may be far more important than a distant enemy with a larger army.
| Target profile | Strategic value | Main risk | Recommended approach |
|---|---|---|---|
| Border rival beside your territory | High because it creates immediate expansion space | Counterattack while your troops are deployed | Strike only if a quick follow-up can claim the area |
| Distant enemy with weak defense | Moderate because it offers no direct land access | Little immediate benefit from the strike | Use only when it weakens a broader coalition |
| Coastal or port-heavy nation | High because trade and supply can be disrupted | Allies may defend the region quickly | Target during a broader push rather than alone |
| Leader of the largest coalition | High because the coalition may collapse | Concentrated retaliation against the shooter | Wait for a moment when allies are separated |
| Small, isolated player | Low unless it blocks a key route | Players may ignore the loss | Save the nuke for a more valuable opportunity |
| Already weakened nation | Very high because one strike may finish the campaign | They may surrender before the impact | Confirm the target is still active and worth finishing |
When a target borders your land, avoid firing and immediately moving every unit into the crater. That creates a predictable opening for a third party. Support the strike with a two-axis advance: hold one defensive front, send only enough strength through the opening to secure objectives, and preserve reserves for the likely counterattack. The objective is not merely to hit the target; it is to occupy the space that the hit exposes.
If you want a deeper explanation of target selection, the guide to nuking a nation provides a separate breakdown of the launch process. For the endgame context, however, the key rule is simple: a target adjacent to your territory deserves priority over a tempting but distant opponent, provided the strike does not trigger a broader coalition response.
Distinguish Punishment From Deterrence
There are two broad ways to use a nuclear weapon. Punishment destroys territory or production and helps you win a local fight. Deterrence leaves the weapon ready and communicates that an attack will be answered. Late-game leaders often need deterrence because they cannot afford to keep every front mobilized, yet a visible nuke option can discourage opportunistic attacks.
| Decision factor | Punishment strike | Deterrence posture |
|---|---|---|
| Goal | Take territory now | Preserve territory later |
| Best time | When a target is exposed and your army can advance | When opponents are probing your borders |
| Required support | Strong follow-up force | Reserve troops and a credible counterattack plan |
| Main advantage | Immediate territorial gain | Prevents coordinated enemy pressure |
| Main weakness | Can start a costly retaliation cycle | Does not remove an entrenched rival by itself |
A player approaching 80% control should sometimes stop firing and preserve the option. If rivals know that every border movement risks a nuclear response, they may spend more time defending and less time contesting your next objective. This is the strategic side of nuclear dominance: control what the enemy believes you can do, not only the land you currently hold.
Timing Strikes Around the 80% Victory Push
The final portion of a RoFront match is a race against coordination, not merely an accumulation of territory. The official game page confirms that 80% control ends the match, so a single well-timed strike can matter most when the map is close to that threshold. A player at 60% needs expansion, while a player at 75% needs to prevent rivals from gaining a faster path to the threshold.
Use three timing windows. The opening window comes when a rival concentrates troops for a major attack. The reaction window occurs when your target is trying to consolidate captured land, and the collapse window appears when an enemy has lost enough territory that one more blow can force elimination. These windows are more useful than a clock because they connect the strike to a specific game state.
| Timing window | What to watch | Best target | Why it works |
|---|---|---|---|
| Enemy commitment | Troops leaving another border | Exposed home territory | Punishes divided attention |
| Consolidation | Captured cities being reinforced | Newly occupied border | Prevents a power spike |
| Exhaustion | Rival spending resources on repairs | Production hub | Converts losses into lasting pressure |
| Retaliation gap | Rival unable to defend immediately | Vulnerable corridor | Creates a short-term opening |
| Final threshold race | Competitors close to 80% | Fastest route to control | Prevents a rival from finishing first |
This rofront nuke damage guide cannot provide a universal damage formula because the developer has not published one. Instead, assess the likely effect through targets and map pressure. A hit on a city cluster can interrupt several development chains at once, while a hit on an empty field only produces a crater. Since community observations may change with updates, test your assumptions in lower-risk situations and preserve your main nuke for a target where the consequence is clearly proportional.
A useful preparation rule is to assign each nuke a purpose before launching it. One may be reserved for breaking a final blockade, another for punishing the most dangerous opponent, and a third for protection against an early coalition move. This prevents the common mistake of firing simply because a target appears in range. If the weapon has no assigned purpose, it remains stronger as a deterrent.
Keep a Retreat Plan
Every launch should include an answer to one question: what happens if the target retaliates? Keep a defensive reserve, identify a fallback border, and avoid making the nuclear action your only strategic plan. This matters even when the strike succeeds, because the targeted player may have allies who interpret the launch as a declaration of nuclear escalation.
The safest launch creates at least one of three outcomes: a direct territorial opening, a production loss that delays an enemy, or a coordinated distraction that helps another front. A launch that creates none of these is risky. It may damage an opponent’s morale, but morale is difficult to measure and cannot be relied upon as your primary win condition.
The official game page also notes that servers can hold as many as 55 players. Even if your immediate rival is isolated, nearby nations may benefit from the chaos. Before committing, consider the wider server and ask whether a large coalition is already forming. A strike that stops one short of the 80% mark may let a distant player inherit the resulting gap.
Build an Ultimate Weapon Doctrine
The rofront ultimate weapon guide perspective is not about using a nuke whenever one becomes available. It is about preserving a valuable strategic option until the map presents a worthwhile trigger. Since exact costs and build times are not publicly confirmed, players should avoid planning around a single precise number. Instead, use a readiness checklist based on available income, threat level, and remaining time.
A strong endgame weapon doctrine follows three phases. First, preserve the option by balancing nuclear investment with ordinary territorial growth. Second, signal your capability when opponents test your borders, without wasting the launch. Third, convert a favorable target into permanent control through immediate follow-up. This creates a repeatable cycle rather than a one-time spectacle.
| Phase | Main objective | What to avoid | Decision rule |
|---|---|---|---|
| Preserve | Keep a credible nuclear option | Spending every resource on an early flashy strike | Launch only when a high-value opportunity exists |
| Signal | Discourage opportunistic attacks | Firing at an irrelevant target | Show readiness while preserving the main option |
| Convert | Turn impact into territory | Leaving the crater for a third party | Pair every major strike with a limited, supported push |
| Consolidate | Defend the 80% threshold | Chasing a distant rival with the last nuke | Prioritize threats to your fastest winning route |
This rofront nuclear dominance framework also applies to alliances. Do not build the plan around the assumption that every ally will support the same target. Some allies may value a coastal port, others a safe inland corridor, and others only a chance to weaken a shared opponent. A launch that serves several interests is less likely to trigger a counter-coalition.
Use a short checklist before every major launch: confirm that the available income can support both the nuclear option and the conventional economy, then recheck the target’s value against the fastest route to 80% control. For example, a rival blocking a coastal port may justify a launch only when a limited force can occupy the crater immediately; empty land or a distant target should remain a preserve-and-signal decision.
-
Does the target block a route toward 80% control?
-
Will the strike destroy active infrastructure, or merely empty land?
-
Can a limited force occupy the opening immediately afterward?
-
Is retaliation likely to involve one rival or several allied nations?
-
Would waiting one turn produce a better target?
-
If the launch fails to stop the target, does it still buy enough time?
If the answers to the first three questions are all no, the launch probably does not belong in the plan. Treat it as a preserve-and-signal decision rather than a nuclear-dominance play: keep the ultimate weapon option alive without spending conventional income on a target that does not block the route toward 80% control, destroy active infrastructure, or create an opening a limited force can occupy. This distinction matters because a crater with no supported follow-up may merely shift territory, while a launch timed against a rival’s coastal port or production area can weaken the opponent’s fastest winning route and create an immediate occupation window.
Defend the Nation That Owns the Nuke
A large arsenal can attract every rival at once. The best defense is not always another weapon; it is geographic depth combined with clear, varied responses. Keep troops between valuable production and open borders, and avoid exposing a single corridor where one strike can disconnect a large part of your territory. If a player can remove one region and your whole network falls apart, the network needs reinforcement elsewhere.
Players report that alliances become more fragile in the final phase because every ally has its own 80% calculation. An ally may stop reinforcing the front if it believes it can win elsewhere, or it may launch its own nuclear option to accelerate that goal. Keep commitments narrow, measurable, and tied to a shared border. The broader domination guide can help connect nuclear timing with your overall expansion plan.
| Threat | Likely response | Defensive purpose | Best indicator |
|---|---|---|---|
| Rival builds a nuke | Keep a reserve and reinforce exposed cities | Prevent a costly opening | Visible threat escalation or unusual unit concentration |
| Coalition targets your border | Use a limited strike to discourage mass entry | Protect production and troop staging | Several players move in the same direction |
| Rival attacks an ally | Hold the relevant border without overextending | Prevent the front from collapsing | Allied call for reinforcement or threatened city |
| Third party enters a crater | Send ordinary forces before the area becomes entrenched | Convert a nuclear opening into controlled land | Fast border movement after an impact |
| Internal front becomes weak | Preserve one tactical reserve | Maintain a credible counterattack | Enemy pressure arrives from two directions |
The best defense against a nuclear opponent may be to avoid presenting a valuable cluster. A player who spreads production across several regions is harder to cripple with one strike, while a player who masses everything around one target gives the enemy an obvious payoff. That does not mean abandoning cities; it means avoiding a single point of failure.
Also consider reputation. Repeated strikes against harmless targets can make rivals unite, while measured use against a clear aggressor can preserve alliances. The official page describes diplomacy, alliances, and nuclear warfare as parts of the same system, so restraint can be a strategic resource too.
Turning Strikes Into a Complete Victory Plan
The final step is to connect every nuclear action to a concrete path toward 80% control. Start by identifying the smallest set of regions required to cross the threshold, then remove the opponents controlling those regions. This turns a broad map into a finite campaign. Nukes are most valuable when they accelerate that sequence, not when they generate unrelated destruction.
Create a target ladder with three levels. Level one contains a direct blocker on your winning route. Level two includes a rival supporting that blocker or threatening an allied bridge. Level three consists of distant distractions and deterrence opportunities. Save your clearest nuke for the highest-value target that remains when the moment arrives.
| Priority | Target role | Required follow-up | Acceptable if... |
|---|---|---|---|
| 1 | Direct blocker on the 80% route | Immediate capture of a nearby city or corridor | It is exposed and your army can secure the crater |
| 2 | Coalition partner or port supplier | Brief advance or economic pressure | It prevents a stronger rival from reinforcing the blocker |
| 3 | Distant competitor | No land follow-up required | The strike prevents that player from reaching the threshold first |
| 4 | Minor nuisance | Hold the nuke | Another target offers more strategic value |
The official page gives 88 player nations and hundreds of tribes, so a late-game board can be crowded. Winning the broad war is impossible if a smaller rival completes its own control objective first. Before launching, compare the target’s route to 80% with your route. A distant opponent that will cross the threshold next deserves priority over a local enemy who is nowhere close, even if the local target appears more threatening right now.
A complete rofront late game nuke strategy also has an exit condition. Decide in advance what will make you stop using nukes: the rival is gone, the key corridor is open, your alliance is unstable, or a counterattack makes a launch too dangerous. Nuclear dominance succeeds when it creates a more favorable map, not when you land the most dramatic strike.
A Practical End-Game Sequence
When the match enters its final phase, treat the nuclear option as part of a coordinated RoFront campaign rather than an isolated payoff. Trigger the ultimate weapon only when a rival’s territory, production cluster, or reinforcement route is blocking a realistic path to 80% server control; the impact should create an opening that conventional units can exploit. For example, if a defender’s narrow corridor protects a nearby neutral zone, target that chokepoint first, then reinforce the exposed flank with a limited army. This sequencing gives the nuke meaningful strategic value while avoiding a costly, unsupported advance.
-
Mark the fastest victory routes. Include your territory, reliable allies, neutral zones, and likely rival endpoints.
-
Identify exposed blockers. Favor players controlling a narrow route or a production cluster close to your next objective.
-
Reserve a normal army. A nuke should open space, but ordinary units must hold that space against a counterattack.
-
Launch at a meaningful target. Confirm that the hit can destroy development, delay reinforcement, or finish an elimination.
-
Advance with limited force. Secure the closest objective instead of sending every unit into the affected region.
-
Reassess the server. Look for a rival who could use the crisis to reach 80% before you can consolidate the gain.
-
Stop or preserve the remaining weapon. End the sequence when your route is open, then protect the new territory.
This process makes the nuke a catalyst inside a larger campaign. It also reduces the chance that a successful impact becomes a costly front. The bombing and nuke defense guide can help you compare offensive pressure with the defensive priorities that follow.
Frequently Asked Questions
When should I use my first nuke in a RoFront match?
Save it for your first genuinely valuable target: a rival blocking a route, a concentrated enemy force, or a nation whose elimination changes the map. Early flashy strikes often trigger alliances without producing lasting control, so judge each target by the follow-up you can realistically complete.
Is it better to nuke a strong nation or a nearby weak one?
A nearby weak nation is usually the better target when it blocks your expansion and you can immediately occupy the opening. A stronger distant rival may be worth attacking only if stopping it prevents another player from approaching the 80% victory threshold.
How can I tell whether opponents are preparing a nuke?
Watch for a sudden concentration of troops, unusual spending, and coordinated movement toward one of your exposed regions. Exact costs and build times are not publicly confirmed, so infer intent from behavior rather than relying on a fixed countdown shown in the interface.
Should I launch a nuke just to scare nearby players?
Deterrence only works when a nuke strike changes another nation’s calculations: destroy a military concentration, threaten a critical corridor, or force an opponent to redirect units from your exposed cities. If a crater produces no territorial advantage or credible retaliation risk, it may instead consolidate an alliance; keep a mobile military reserve so allies cannot exploit the unresolved impact zone.
What should I do after creating a nuclear opening?
Send a limited force to secure the nearest objective, hold a defensive reserve for retaliation, and watch other nations. A crater is temporary; controlled cities, ports, and supply routes are what convert the impact into a measurable gain toward 80% world control.